Launching Public Image on AWS
This section describes how to setup and load the AWS image.
| ➢ | To setup and load the AWS image: |
| 1. | Log into your AWS account. |
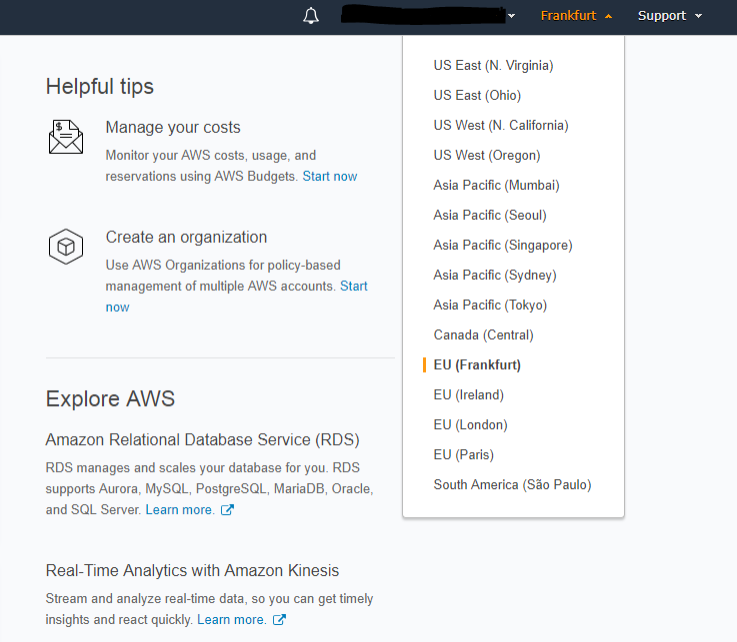
| 2. | Choose one of the following regions: |
| ● | eu-central-1 (Frankfurt) |
| ● | us-east-1 N. Virginia) |
| ● | ap-southeast-1 (Singapore) |
See https://aws.amazon.com/premiumsupport/knowledge-center/copy-ami-region/ for instructions on how to copy AMIs from one of the provided regions above to any other region that the customer requests.
Select Region
| 3. | In the “Services” menu, choose EC2. |
Services Menu - EC2

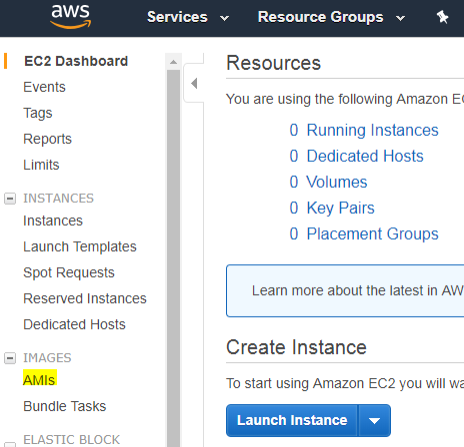
| 4. | In the Dashboard, navigate to IMAGES > AMIs. |
Images
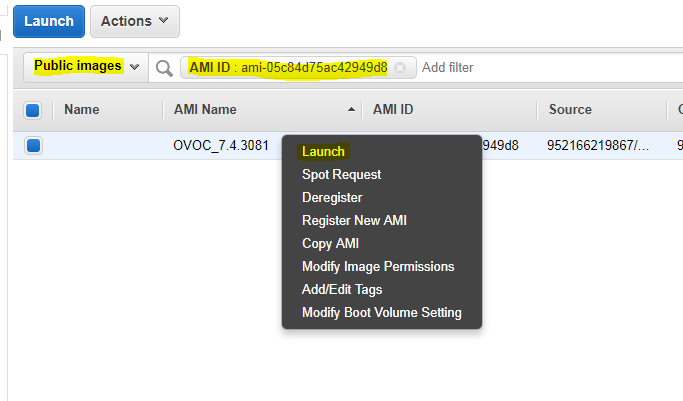
| 5. | In the search bar, choose Public images and apply the following filter: |
AMI ID : ami-00000000000 replacing ami-00000000000 with the AMI ID you received from AudioCodes according to the region you have chosen.
| 6. | Right-click the AMI and choose Launch. |
Launch Public Images
| 7. | Choose an Instance type according to the requirements specified in OVOC Server Minimum Requirements. |
| 8. | Configure Instance (Optional). Using this option, you can edit network settings, for example, placement. |
| 9. | Configure a Security Group; you should select an existing security group or create a new one according to the firewall requirements specified in the table below: |
Firewall for Amazon AWS
|
Protocol |
Port |
Description |
|---|---|---|
| UDP | 162 | SNMP trap listening port on the OVOC server. |
| UDP | 1161 | Keep-alive - SNMP trap listening port on the OVOC server used for NAT traversal. |
| TCP | 5000 | Communication for control, media data reports and SIP call flow messages |
| TCP (TLS) | 5001 | TLS secured communication for control, media data reports and SIP call flow messages |
| NTP | 123 | NTP server port (also configure the AWS IP address/Domain Name as the NTP server on both the managed device and OVOC server; see relevant procedures in Connecting Mediant Cloud Edition (CE) SBC Devices on AWS |
| 10. | Click Review and Launch > Review > Launch. |
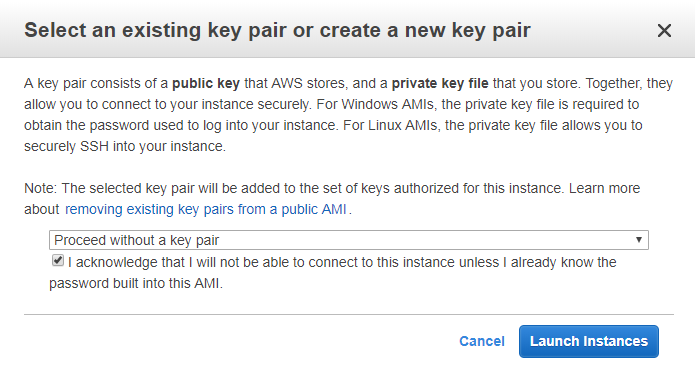
| 11. | In the dialog shown in the figure below, from the drop-down list, choose Proceed without a key pair, check the “I acknowledge …” check box, then click Launch Instances. |
Select an Existing Key Pair
| 12. | Click View Instances and wait for the instance to change the state to “running” and the status checks to complete. In the description, note the Public IP address of the instance as highlighted in the figure below. |
Instance State and Status Checks
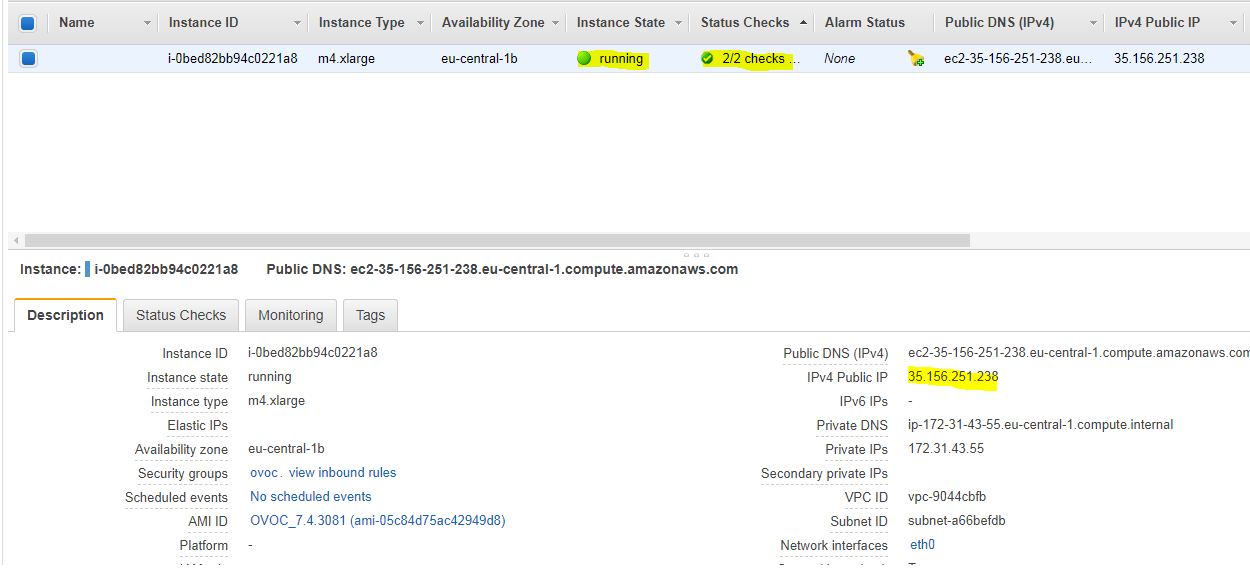
The AWS public IP address as its later configured in Step 2-1 Configuring the OVOC Server (OVOC Server Manager) on AWS.